
Set up BuiltKIOSK
What BuiltKIOSK is, what you need before you start, and how to get a self-order kiosk running in your store.
On this page
BuiltKIOSK is the self-order screen your customers use. They browse your menu, pick options, and either pay by card on the kiosk or take a receipt to the counter and pay there. Orders go straight to your kitchen display and printers.
What you need#
- A BuiltPOS store that is already set up. The kiosk sells the products, prices and taxes from your store.
- The Self-Service Kiosk add-on turned on for your store. Check it in BuiltOFFICE under Marketplace. See Plans and billing for the cost.
- An Android tablet (Android 8.0 or newer). Sunmi K2, D2 and T2 kiosks work well because they have a built-in receipt printer.
- A receipt printer: the Sunmi built-in printer, a network (Wi-Fi or Ethernet) receipt printer, or a Bluetooth printer.
- Optional: a card terminal if customers should pay at the kiosk (Clover Pay Display, PAX, or Worldpay).
- Wi-Fi or Ethernet that reaches the internet. The kiosk is built to stay online.
Steps#
- On the tablet, open the Downloads page on pos.builtsofthub.com. Ask your BuiltPOS contact for the download password.
- Under BuiltKIOSK, download the Android APK and install it. (You may need to allow installs from your browser in Android settings.)
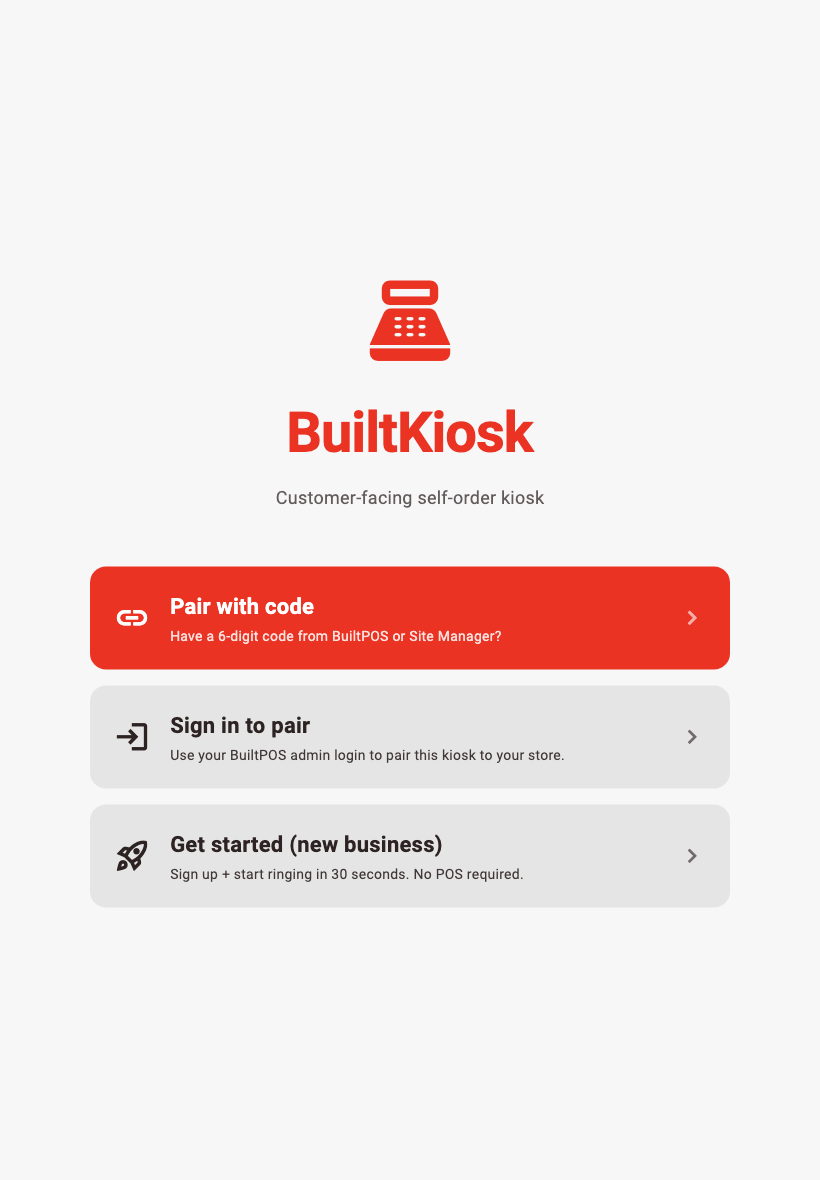
- Open BuiltKIOSK. You see the welcome screen with three choices.
- Tap Pair with code to link the kiosk to your store. Follow Pair the kiosk.
- When pairing finishes, the kiosk shows its start screen (Tap to start).
- Press and hold anywhere on the start screen. Enter the admin PIN (it starts as 0000).
- Tap Settings. The kiosk asks you to Set an admin PIN first. Tap Set PIN and choose your own 4–6 digit PIN.
- In Kiosk Settings, choose your Printer (Sunmi, Network, Bluetooth or None) and tap Test print.
- Under Payment mode, choose Pay at counter or Card terminal. See Kiosk payments.
- Check your menu: set what the kiosk sells in BuiltOFFICE. See Kiosk menu and items.
- Place a test order and check that it reaches the kitchen (or tap Send test order to KDS in Kiosk Settings).
Good to know#
- Get started (new business) on the welcome screen creates a brand-new business. Don't use it if you already have a BuiltPOS store — pair instead.
- The kiosk runs full screen and hides the Android buttons. To lock the tablet to BuiltKIOSK completely, use Android's screen pinning or your device-management tool.
- Settings stay locked until you change the factory PIN 0000. Anyone who knows 0000 could unpair the kiosk or change how it takes payment.
- Idle Timeout (default 60 seconds) sends the kiosk back to the start screen when a customer walks away.
- If your store's subscription is suspended, the kiosk shows This kiosk is temporarily unavailable to customers.
Kiosk mode inside BuiltPOS#
A BuiltPOS register can also run a simpler kiosk screen (Store Management → Kiosk Mode). It is useful on a Windows touch screen or iPad you already own. Most stores use the BuiltKIOSK app on a tablet. See Exit kiosk mode for how to leave either one.
Was this helpful?
Thanks for letting us know.
Sorry it did not help. Tell us what was missing: open Help & Support in the app and choose Report a problem, or email support@builtsofthub.com.