
Add and edit products and categories
Add a product with its price, cost, barcode, category and tax, edit it later, hide it from sale, and organise categories and product groups.
Add a product#
- Go to Inventory → Products.
- Tap Add Product.
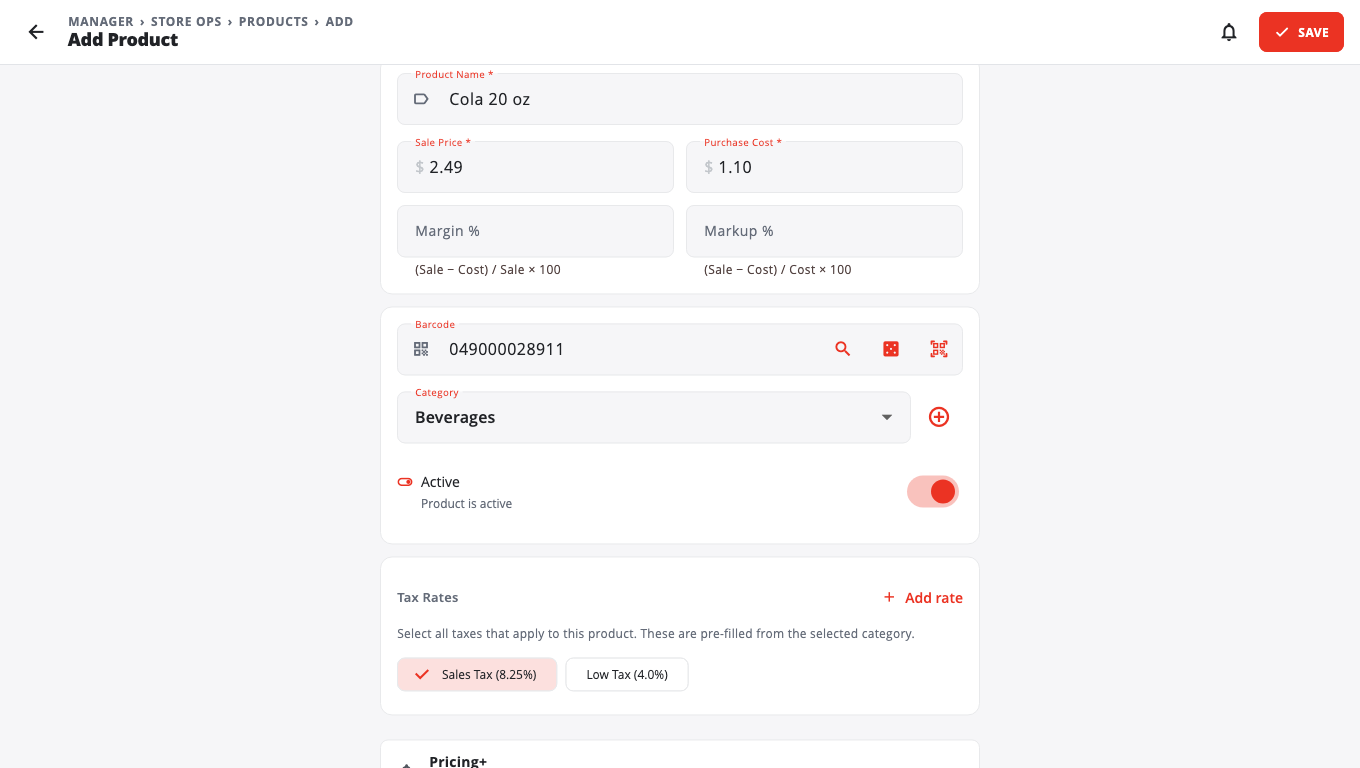
- Fill in Product Name, Sale Price and Purchase Cost. Margin and markup are worked out for you.
- Scan or type the Barcode. You can also tap Generate barcode for an item that has none.
- Pick a Category. The category's taxes are filled in for you.
- Under Tax Rates, check the taxes. You can pick more than one. With none selected, the product is not taxed.
- Open the other sections if you need them:
- Tax & compliance: Requires age verification, EBT Eligible, EBT Food (SNAP-eligible), Bottle Deposit (CRV).
- Stock: Opening Stock, Reorder Point, Supplier, Sold by weight.
- Display: where the product shows (see below).
- Tap Save.
Edit a product#
- Go to Inventory → Products.
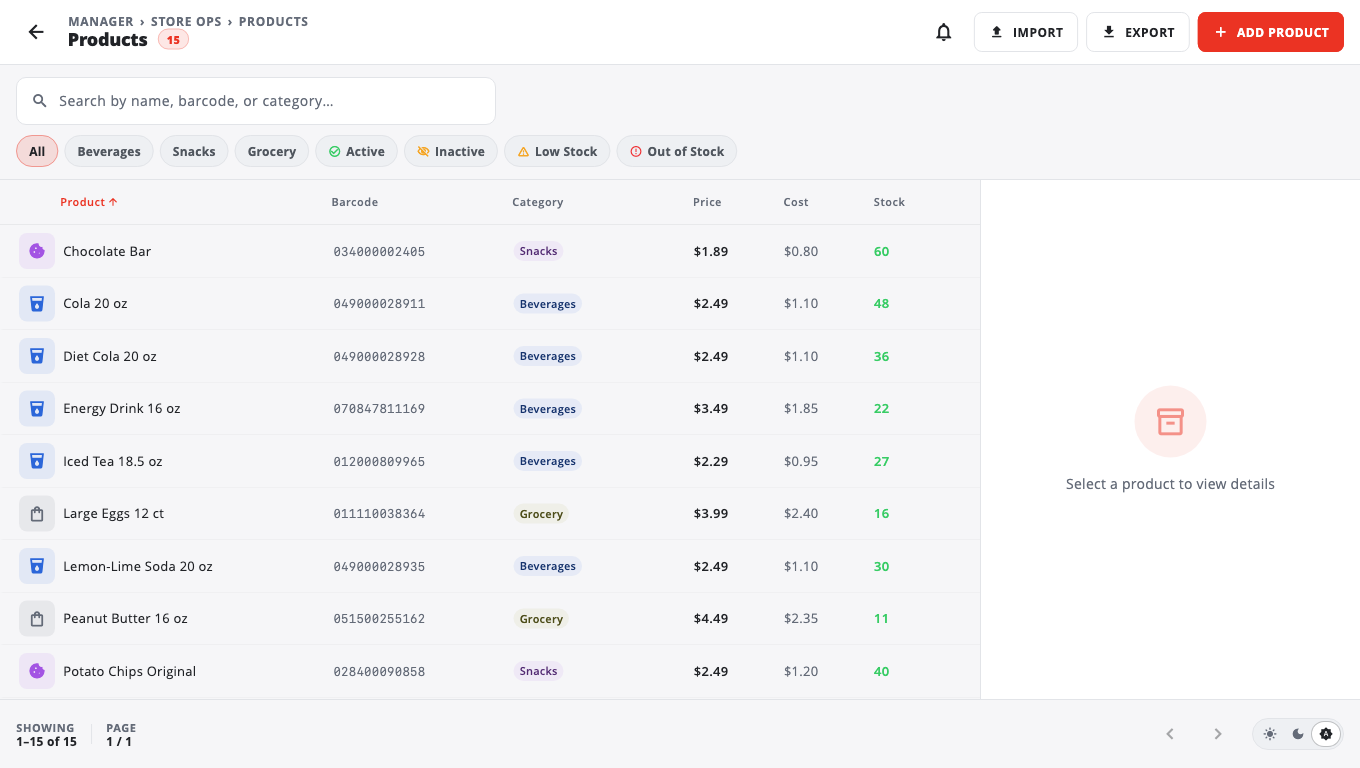
- Search by name, barcode or category, or use the filter chips (Active, Inactive, Low Stock, Out of Stock).
- Tap the product. The Edit Product page opens.
- Change what you need and tap Save.
To change a price on a future date, tap Schedule price change… on the edit page. See Stock and price changes.
Stop selling a product#
Products are never deleted, so your sales history stays complete.
- In the product list, open the product's menu (Product actions).
- Tap Deactivate product, then Deactivate.
The product disappears from sale on every till. To bring it back, use Reactivate product.
Choose where products show#
Go to Inventory → Product Visibility (on the … more cards hidden — Show all list). Tick POS, Kiosk, Online or Featured for each product, or use the bulk buttons such as All POS and No Kiosk. Tap Save.
Categories#
- Go to Inventory → Categories and tap Add.
- Enter the Category Name. You can also pick a Department.
- Choose the Category Tax. This tax goes on every product in the category, both the ones already in it and new ones, when you save.
- Restaurants can pick a Kitchen station / printer (optional) for the category.
- Use Require age verification and SNAP / EBT eligible to set defaults for new products in this category.
- Tap Add Category (or Save when you edit one).
To delete a category that still has products, BuiltOFFICE asks where to move them first (Move & delete).
Product groups#
Product groups collect products for promotions and coupons (for example "All 20 oz drinks"), and for kitchen routing.
- Go to Inventory → Product Groups → Add Group.
- Enter the Group Name and tap Create.
- Open the group and tap Add Product to fill it.
To take a product out of a group, open the group and tap the remove icon (Remove from group) on its row, then Remove. The product stays in your catalog.
To delete a whole group, open it and tap Delete group. BuiltOFFICE lists the promotions that use the group; they are deleted with it (the button then reads Delete group and promotions). The products stay in your catalog. Only an owner or admin can delete a group.
Good to know#
- Only managers, owners and admins can add products.
- Bundles (several products sold as one, with their own barcode) are under Inventory → Bundles. They are not available on legacy Windows POS stores.
- On a phone, use the scan button on the Products list to find a product by its barcode with the camera.
- Changes reach the tills on their next sync, usually within a minute.
Was this helpful?
Thanks for letting us know.
Sorry it did not help. Tell us what was missing: open Help & Support in the app and choose Report a problem, or email support@builtsofthub.com.