
Kitchen stations and printers
Add your printers, create kitchen stations, choose whether each station uses a kitchen screen, a printer or both, and decide which items go where.
Go to POS → Printers & Kitchen. It has three tabs: Printers, Stations and Routing.
Add a printer to the catalog#
The catalog is a list of your store's printers, so you can give the same printer to several tills.
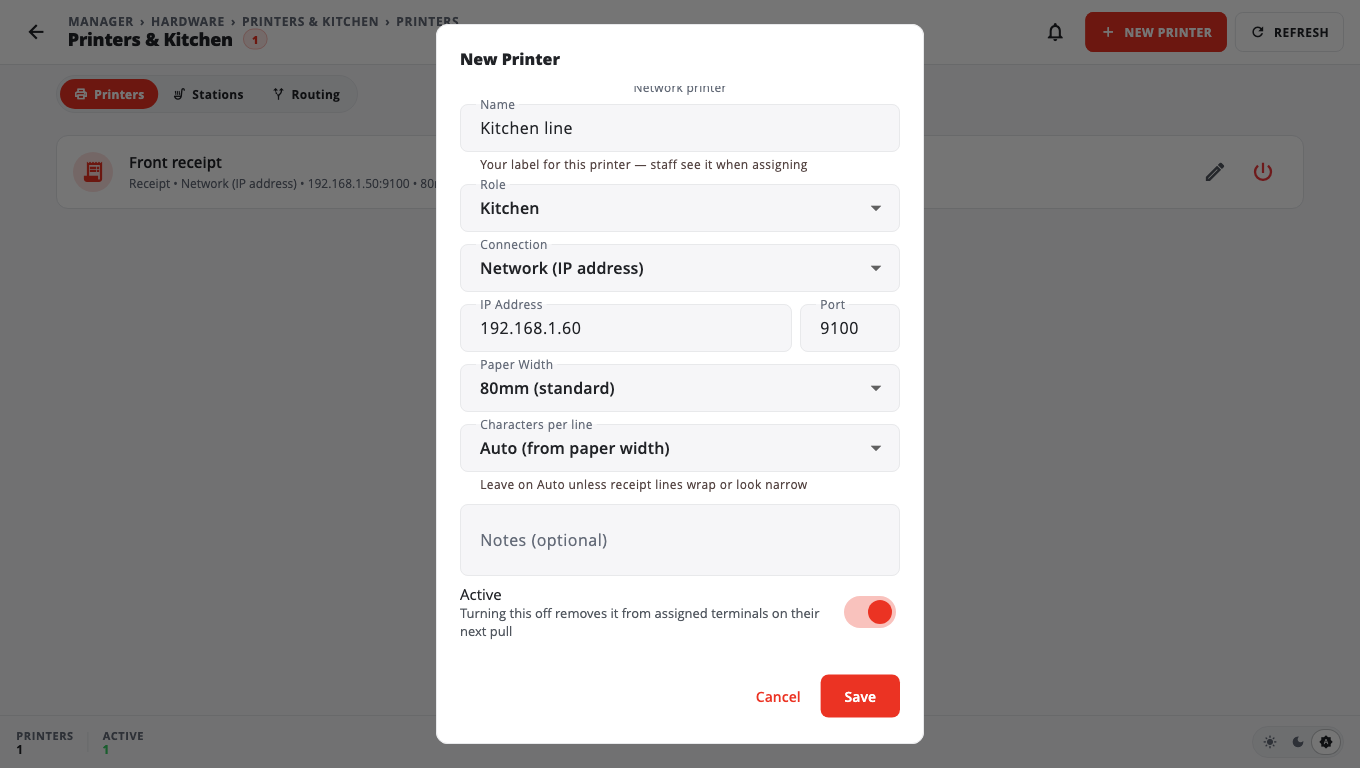
- Open the Printers tab and tap New Printer (or Add First Printer).
- Enter a Name, for example "Kitchen line".
- Choose the Role: Receipt, Kitchen, Barcode / Label or A4 / Report.
- Choose the Connection:
- Network (IP address): enter the printer's IP address and port.
- Windows printer (driver name): the printer name as Windows shows it.
- Built-in (Sunmi): the printer inside a Sunmi terminal. No address needed.
- USB / wired or Bluetooth: these are set up on the device itself; this entry only records that the printer exists.
- Choose the Paper Width (58 or 80 mm) and, if needed, Characters per line (leave Auto (from paper width) unless your receipts look wrong).
- Tap Save.
Then give it to a till: POS → Terminals → the till's menu → Assign printers.
Under Printers set on tills you see the printers each till chose for itself (on the till under Store Management → This Till → Printers). Change those on the till.
Add a kitchen station#
A station is a part of the kitchen, such as "Grill", "Fryer" or "Bar".
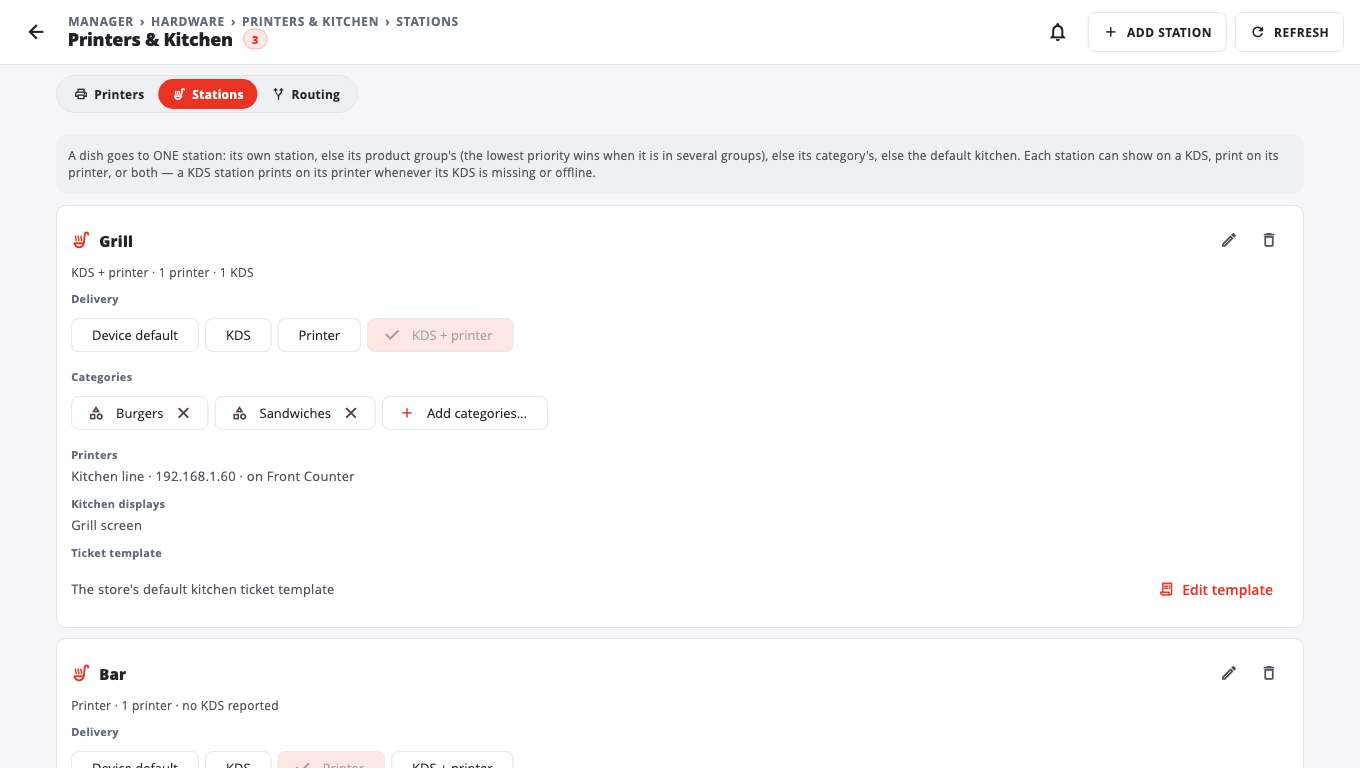
- Open the Stations tab and tap Add station.
- Enter the Station name.
- Choose the Delivery: KDS (kitchen screen), Printer, or KDS + printer. New stations start as KDS + printer.
- Tap Save.
For a KDS station, Print on the station printer when its KDS is missing or offline is on by default, so no ticket is lost if the screen is down.
Send items to the right station#
You can choose a station in three places. The most specific one wins:
- The product: on the product page, the Kitchen section → Kitchen station / printer. It starts as Same as category.
- A product group: Inventory → Product Groups → open the group → Kitchen station. If a product is in more than one group, the group with the lowest Priority number wins.
- The category: on the category, Kitchen station / printer (optional). You can also add whole categories to a station from the Stations tab with Add categories….
Anything with no station goes to the default kitchen.
The Routing tab draws a picture of which tills, printers and screens each station uses, so you can check your set-up.
Kitchen ticket design#
Each station can have its own ticket design, or use the store's default. On the Stations tab, tap Edit template. See Receipt designer.
Good to know#
- Renaming a station renames it on every product, group, category and printer.
- Kitchen screens are paired like tills. See Terminals and devices.
- Kitchen stations and the printer catalog are not available on legacy Windows POS stores.
Was this helpful?
Thanks for letting us know.
Sorry it did not help. Tell us what was missing: open Help & Support in the app and choose Report a problem, or email support@builtsofthub.com.