
Set up a barcode scanner
Use a USB, Bluetooth, camera or built-in scanner with BuiltPOS and set how scanned codes are read.
USB scanner (Windows, or Android with an OTG adapter)#
- Plug the scanner in. Most scanners work like a keyboard and need no driver.
- Make sure the scanner sends Enter after each code (the factory setting on most scanners).
- Scan an item on the sale screen. It adds to the cart.
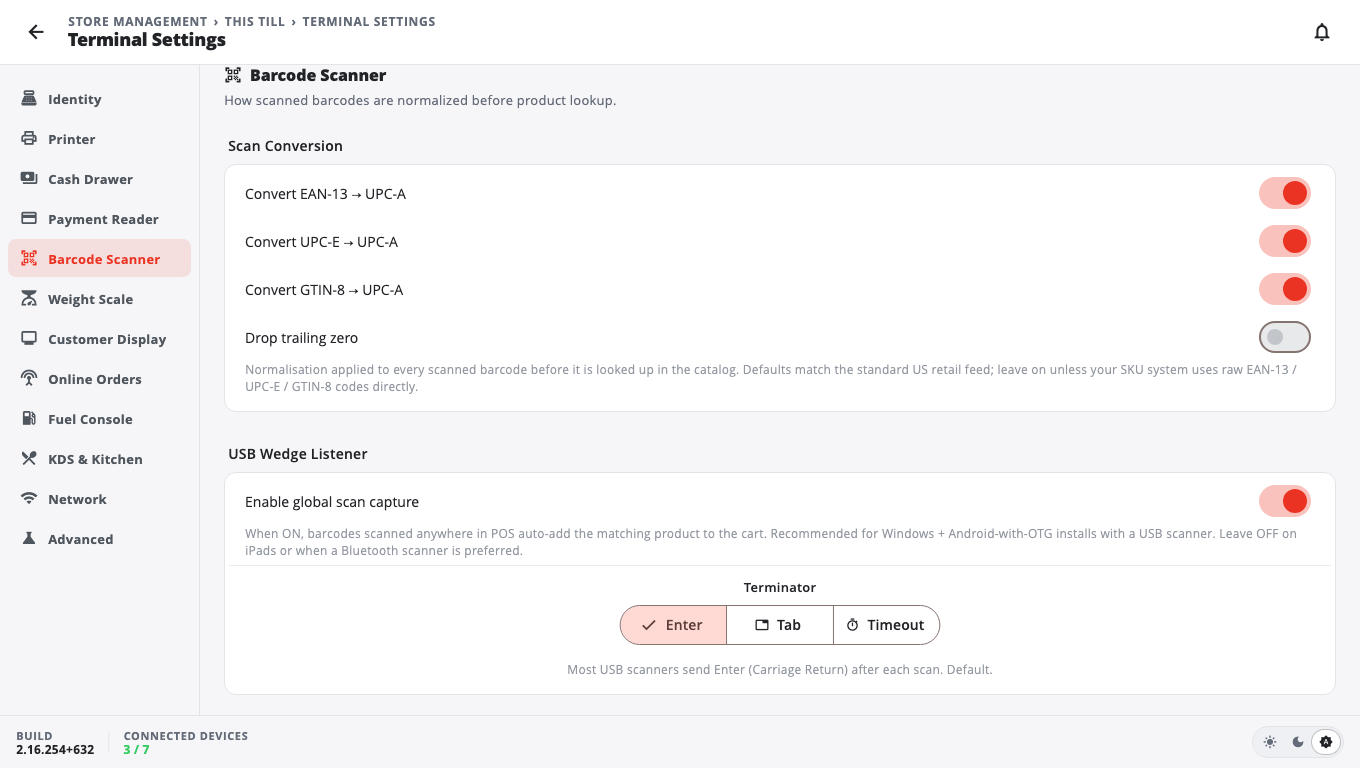
- To make a scan add the item even when the cursor is somewhere else, open Store Management → This Till → Terminal Settings → Barcode Scanner, turn on Enable global scan capture (under USB Wedge Listener), and tap Save. A brand-new Windows install starts with it on; on other devices it starts off. It is recommended for Windows and Android-with-OTG tills with a USB scanner. The till's Set up this till checklist (in Store Management) shows Scanner set up once it is on.
Bluetooth scanner (all devices)#
- Put the scanner in keyboard (HID) mode — see its manual.
- Pair it in the device's Bluetooth settings.
- Scan on the sale screen. Leave Enable global scan capture off on iPads.
Camera (iPad, iPhone, Android)#
- On the sale screen tap the barcode-scanner icon in the search bar (on a phone, a scan button also floats at the bottom while the cart is empty).
- Point the camera at the barcode. The item is added and the camera stays open for the next item.
- Tap Done when finished.
On Windows the same button waits for a USB or Bluetooth scan instead of opening a camera.
Sunmi, Newland or Urovo built-in scanner (Android)#
- In the device's own Scanner settings, set the output to Broadcast.
- In Terminal Settings → Barcode Scanner, turn on Receive scans from the built-in scanner (under Built-in Scanner) and tap Save.
Leave it off if your built-in scanner types into fields (keyboard output) — that works without it. See Sunmi devices.
How codes are read#
In Barcode Scanner → Scan Conversion:
- Convert EAN-13 → UPC-A, Convert UPC-E → UPC-A and Convert GTIN-8 → UPC-A are on by default, so the same product is found whichever form the scanner sends.
- Drop trailing zero is off by default.
Leave these as they are unless your product codes are stored as raw EAN-13 / UPC-E / GTIN-8.
Good to know#
- Terminator: Enter (default), Tab, or Timeout for scanners that send nothing after a code.
- On Store Management screens a scan goes into the search or barcode field you are in and is looked up. A scan is never typed into a quantity, price, PIN or note field.
- Over the sale screen, only dialogs made for scanning (price check, serial number, ID check) take a scan.
- Deli and produce scale labels: see Scales.
- Scans not working? See Scanner troubleshooting.
Was this helpful?
Thanks for letting us know.
Sorry it did not help. Tell us what was missing: open Help & Support in the app and choose Report a problem, or email support@builtsofthub.com.