
Use BuiltPOS on a Sunmi device
Print on the Sunmi built-in printer, open its cash drawer and use its built-in scanner.
BuiltPOS runs on Sunmi Android registers and handhelds. The till recognises a Sunmi device and points you to the right settings.
Built-in printer#
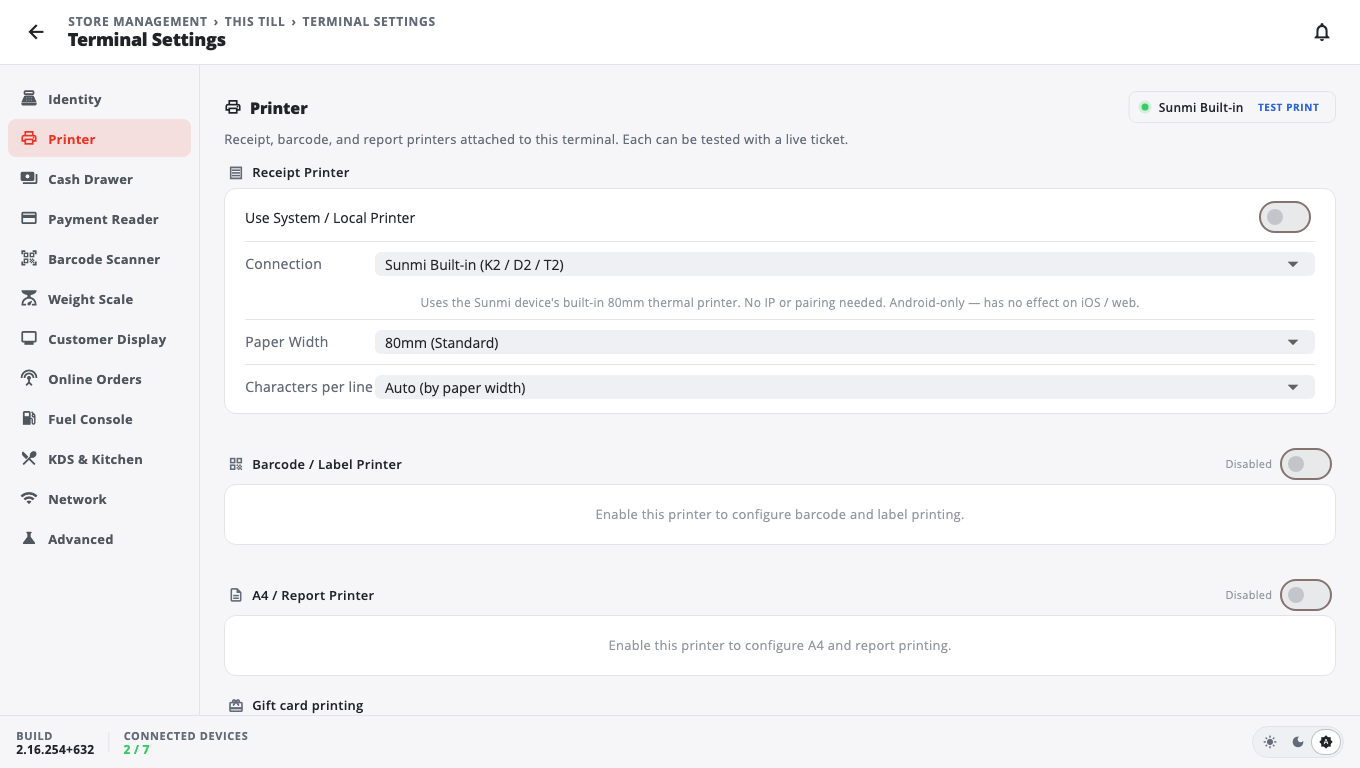
- Open Store Management → This Till → Terminal Settings → Printer.
- Under Receipt Printer, set Connection to Sunmi Built-in (K2 / D2 / T2). No IP address or pairing is needed.
- Set Paper Width:
- 80mm (Standard) on counter registers (K2, D2, T2).
- 58mm (Narrow) on handhelds (V2, P2, L2).
- Tap Save, then Test Print.
Cash drawer#
With the built-in printer selected, a drawer connected to the Sunmi register opens on its own. Set when it opens in Terminal Settings → Cash Drawer — see Cash drawer.
Built-in scanner#
The built-in scanner on Sunmi (also Newland and Urovo) devices can work two ways:
- Keyboard output (it types into the field you are in) — works with no setup.
- Broadcast — scans reach the cart and every screen, even when no field is selected:
- In the device's own Scanner settings, set the output to Broadcast.
- In Terminal Settings → Barcode Scanner, turn on Receive scans from the built-in scanner (off by default) and tap Save.
Good to know#
- The Sunmi built-in printer choice only works on Android. If the till says This is a Sunmi device but Sunmi Built-in is not selected, receipts are going somewhere else.
- A network (IP) receipt printer also works on a Sunmi device.
- The scan settings are explained in Barcode scanners.
Was this helpful?
Thanks for letting us know.
Sorry it did not help. Tell us what was missing: open Help & Support in the app and choose Report a problem, or email support@builtsofthub.com.