
Set up a receipt printer
Connect a network, Windows (USB / driver) or Sunmi built-in receipt printer, pick the paper width and print a test.
Before you start#
- Network printer: give the printer a fixed IP address (most printers print their address on a self-test page — hold the feed button while you switch it on). It must be on the same network as the till.
- Windows USB printer: install the printer's Windows driver first and check it shows in Windows Settings → Printers & scanners.
Set it up#
- Open Store Management → This Till → Terminal Settings.
- Tap Printer in the list on the left.
- Under Receipt Printer, choose how it connects:
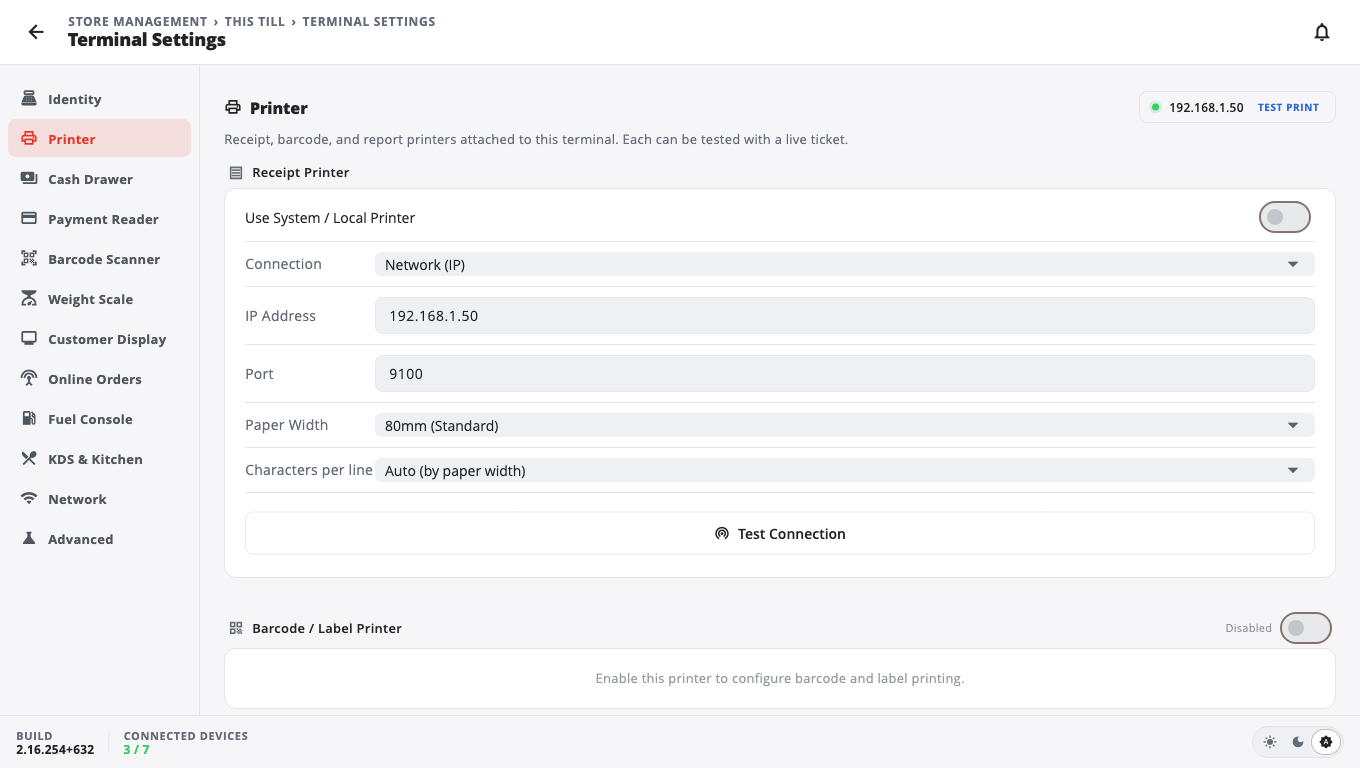
- Network printer (any device): leave Use System / Local Printer off, set Connection to Network (IP), then enter the IP Address and Port (usually 9100).
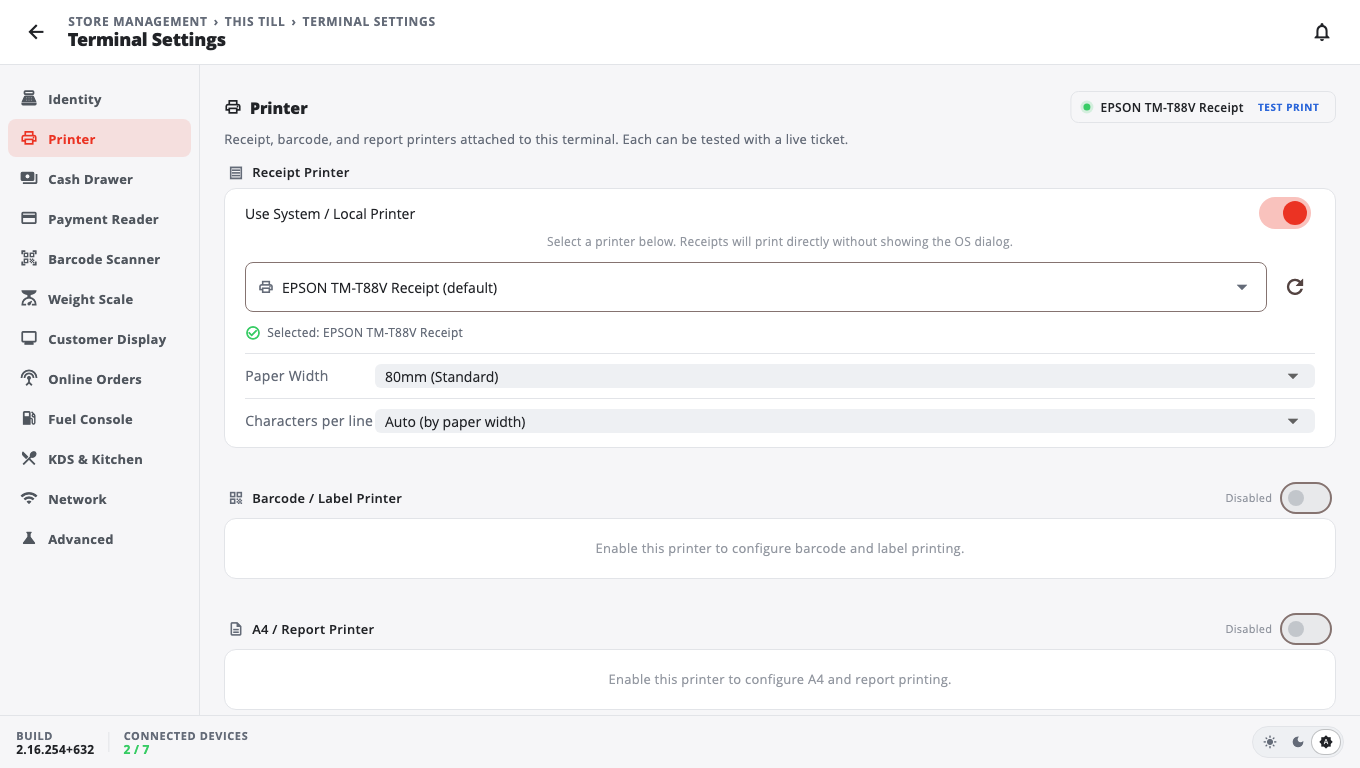
- Windows USB or driver printer (Windows only): turn on Use System / Local Printer, then pick the printer from the list. Tap the refresh icon if it is missing. Receipts then print straight to it with no Windows print box.
- Sunmi register (Android only): set Connection to Sunmi Built-in (K2 / D2 / T2). See Sunmi devices.
- Set Paper Width to 80mm (Standard) or 58mm (Narrow) to match your roll.
- Leave Characters per line on Auto (by paper width) unless lines wrap or look too short (see Good to know).
- Tap Save at the top right.
- Tap Test Print (or Test Connection for a network printer). A test ticket should print.
Choose when receipts print#
Still in Printer, scroll to Receipt Printing. For each payment type (On Cash Payment, On Credit / Debit, On EBT, On Check, On Mobile Pay, On Split Payment, On Payout) pick:
- Print — always print.
- Popup — show a small print choice card.
- Preview — show the receipt first, print if asked.
- Don't Print — never print.
Out of the box, cash and payouts show Preview, cards, EBT, checks and split payments Print, and mobile pay Don't Print.
Card sale copies decides if a card sale prints a signed Merchant + customer copy pair or the Customer only copy (the default).
Fix a receipt that is cut off on the left (Windows)#
Some Windows printer drivers report their edges wrongly, so the left side of the receipt is cut off or it is off-centre.
- In Printer, make sure Use System / Local Printer is on and your printer is selected.
- Tap Print alignment test.
- Use Move print left / right to shift the print in 0.5 mm steps until the first ruler digit on the test page prints in full.
- Print the test again to check, then tap Save.
Good to know#
- iPad, iPhone and Android can only print to a network (IP) printer or a Sunmi built-in printer. Bluetooth and USB printers plugged into a tablet are not supported.
- Characters per line: pick 32 (58mm standard), 42 (180dpi 80mm) or 48 (203dpi 80mm) if columns are misaligned or the right edge is cut off on a network printer.
- The receipt's side margins and layout are set in the Receipt Designer. See Receipt designer.
- The Printers tab shows this printer next to the kitchen printers; tap it to jump back here.
- Printing problems? See Receipt printer troubleshooting.
Was this helpful?
Thanks for letting us know.
Sorry it did not help. Tell us what was missing: open Help & Support in the app and choose Report a problem, or email support@builtsofthub.com.