
Your first sale
Ring up items, take payment and finish the sale — a quick walk-through of the sale screen.
This walk-through assumes the register is linked and a shift is open.
On a register, tablet or Windows PC#
- On Home, tap POS.
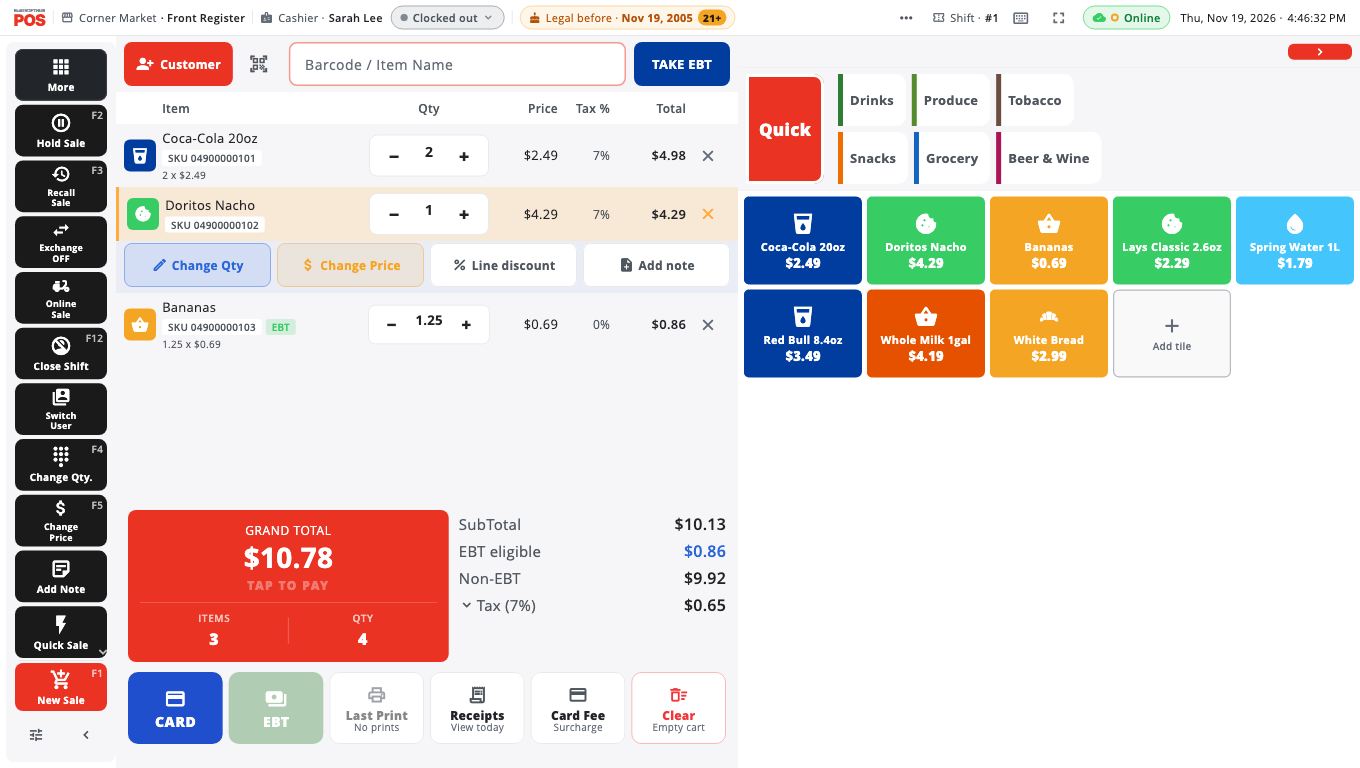
- Scan an item's barcode, or type its name in the Barcode / Item Name box and pick it from the list. You can also tap a product tile on the right.
- The item appears in the cart in the middle of the screen. Add more items the same way.
- Tap the red Grand Total card (TAP TO PAY) to open Take payment.
- For cash: leave Cash selected, tap Exact (or the bill the customer handed you), then tap Complete payment. The screen shows Change due when there is change to give.
- For a card: tap CARD under the Grand Total instead of step 4. The card terminal asks the customer to tap, insert or swipe. When the card is approved the sale finishes on its own.
On a phone#
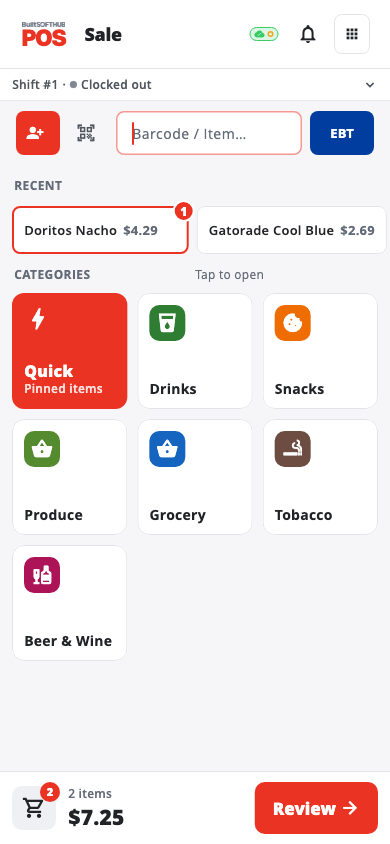
The phone has its own step-by-step layout:
- Tap a category tile (or Quick for your pinned items), or search / scan at the top.
- Tap a product to add one. To add several at once, press and hold the product, set the quantity and tap Add × (or Add to Cart).
- Tap the cart bar at the bottom to open Review.
- Check the items and tap Checkout.
- Pick a payment method and finish as above.
After the sale#
Depending on your receipt settings, the register prints a receipt, shows the receipt screen, or goes straight back to an empty cart. Before you complete a sale you can pick Email, Text, Print or None on the receipt strip at the bottom of Take payment.
Good to know#
- Made a mistake? Select the line and tap Remove (the register asks Remove item? first), or see Void a sale after it is finished.
- More detail: Ring a sale, Take a cash payment, Take a card payment.
- No internet? Keep selling. Cash sales are saved on the register and sync when the connection is back. See Working offline.
Was this helpful?
Thanks for letting us know.
Sorry it did not help. Tell us what was missing: open Help & Support in the app and choose Report a problem, or email support@builtsofthub.com.