
Set up a Clover terminal
Connect a Clover Mini, Flex or Station with Cloud Pay or Pay Display (LAN), authorize your Clover account and test a sale.
Payment setup is managed by BuiltPOS. You need BuiltPOS support, or a payment-setup support token from them, to open this page — see Choose the card terminal for a till.
Cloud Pay or Pay Display?#
- Cloud Pay — the till talks to Clover over the internet. Works everywhere; needs internet for every card sale.
- Pay Display (LAN) — the till talks straight to the Clover device on your network. Faster; needs the device's IP address and serial number.
Cloud Pay#
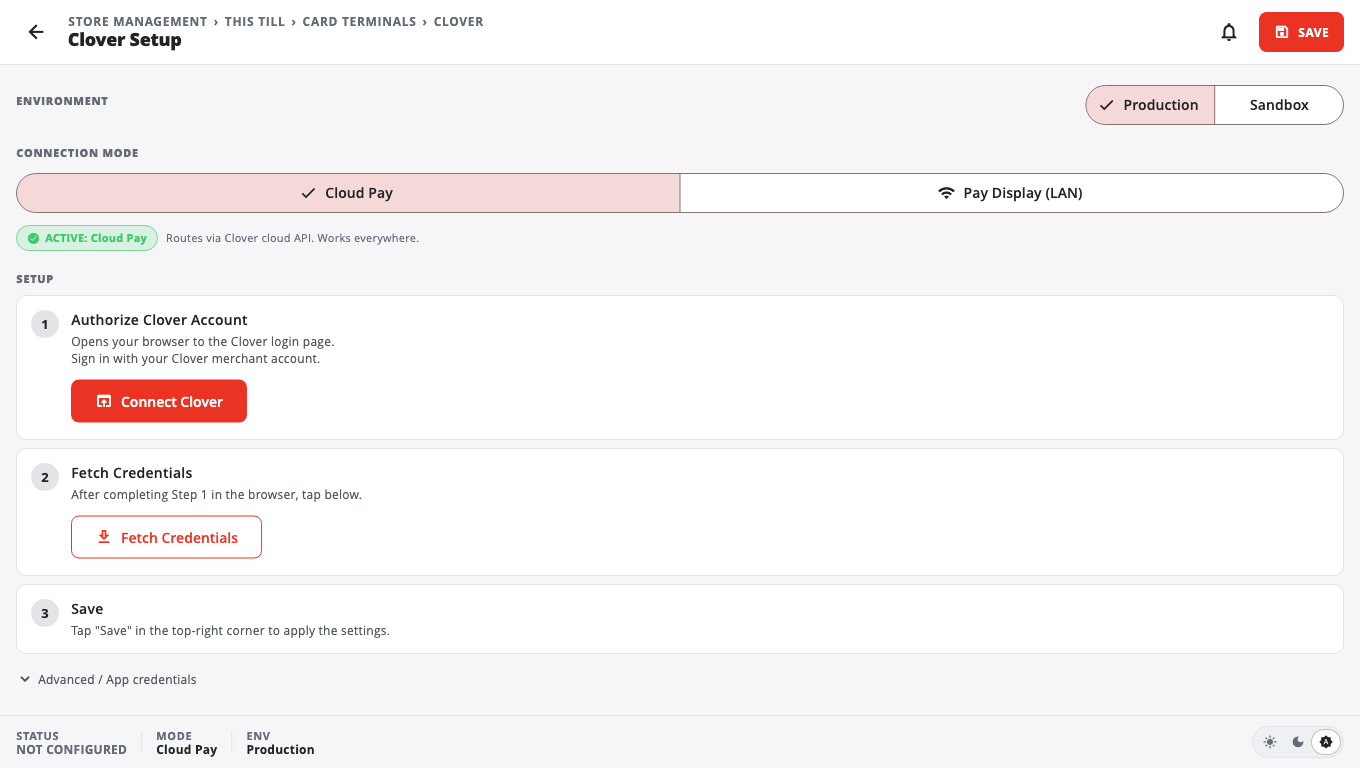
- Open Store Management → This Till → Card Terminal → Clover.
- Under Environment choose Production (use Sandbox only for testing).
- Under Connection Mode choose Cloud Pay.
- Tap Connect Clover. Your browser opens the Clover login page — sign in with your Clover merchant account and approve.
- Back on the till, tap Fetch Credentials.
- Optional: enter the Device Serial (on the device: Settings → About → Serial Number). Leave it blank to use any device.
- Tap Save at the top right.
- Tap Test Connection, then Test $1.00 Sale (charges, then voids) to check a real payment.
Pay Display (LAN)#
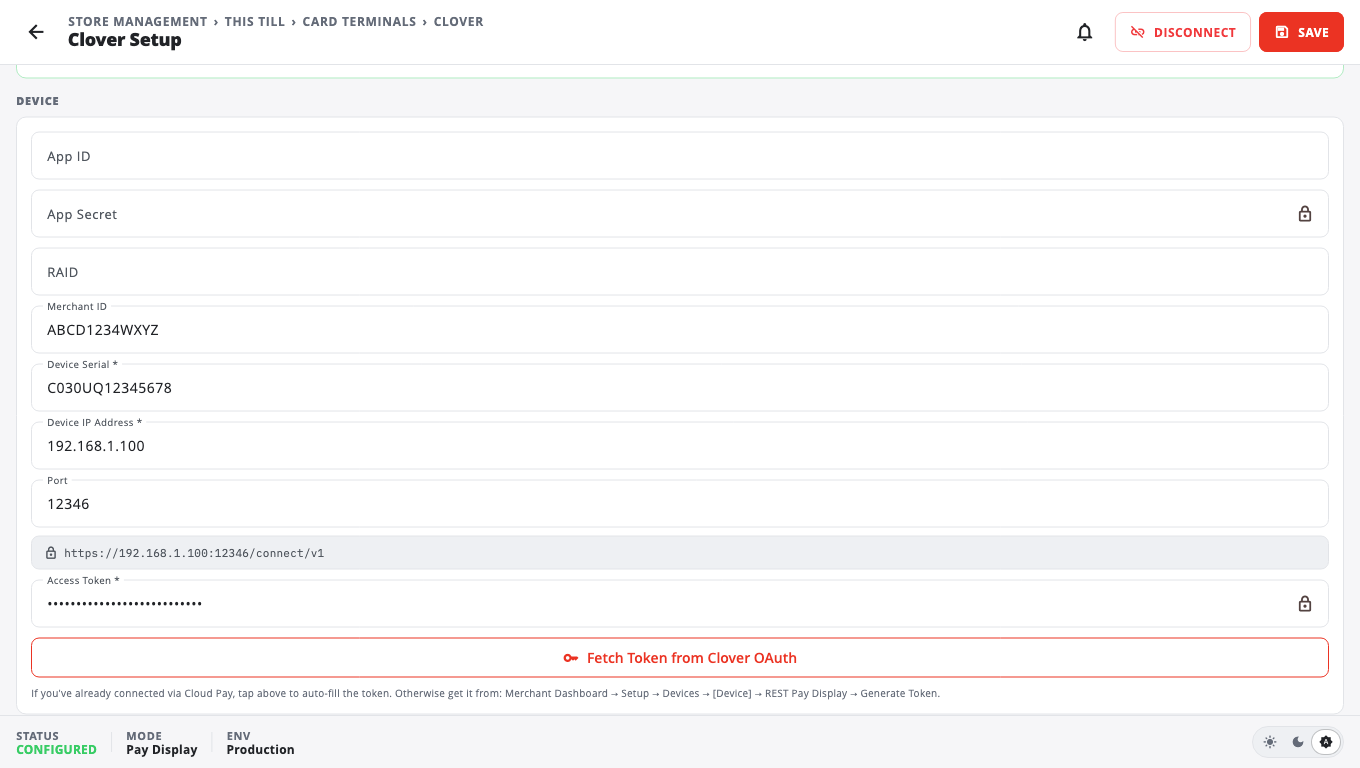
- On the same page choose Pay Display (LAN).
- Tap Connect Clover, sign in and approve, then tap Fetch Credentials. Pay Display uses the same Clover token.
- Enter Device Serial * (required — on the back of the device, or Clover Dashboard → Setup → Devices) and Device IP Address * (on the device: Settings → Network). Leave Port on 12346.
- If the Access Token * box is empty, tap Fetch Token from Clover OAuth.
- Tap Save, then Test Connection and Test $1.00 Sale (charges, then voids).
Options#
- Accepted Payment Types — Credit Cards, Debit Cards, Contactless / NFC and EBT / Food Stamps (EBT is off by default).
- Tip prompt — Off, On payment terminal or On customer display. Choose one place; the customer is only asked once.
- Timeout — how long the till waits for the device.
If Clover says it is not allowed#
You may see: Clover connected, but the BuiltPOS app on Clover is not allowed to create orders. This is a Clover permission, not a fault on the till, and reconnecting alone does not fix it: the BuiltPOS app on Clover needs the Orders (read+write) and Payments permissions. Contact BuiltPOS support. Once the permissions are in place, tap Re-authorize, approve again in the browser, then Fetch Credentials and Save. Use cash or another way to pay meanwhile.
Good to know#
- Disconnect at the top removes the Clover connection from this till.
- In Sandbox mode no real money moves — switch to Production before you go live.
- Problems: Card terminal troubleshooting.
Was this helpful?
Thanks for letting us know.
Sorry it did not help. Tell us what was missing: open Help & Support in the app and choose Report a problem, or email support@builtsofthub.com.